4 October 2017 – I updated the code for Swift 4 and iOS 11. You can find it here.
I feel that the internal sensors of iToys are under-appreciated as crucial sources of information for computer vision. It is almost magical that these sensors can measure such basic physical entities as acceleration, rotation, and the strength and direction of the Earth’s magnetic field. The simple goal here is to use them to find the 3D orientation of the camera. How is the camera oriented in 3D space?
First, the accelerometer measures the acceleration of the device (in m/s²) in the three principal directions. Gravity always pulls the device towards the center of the earth, so this little sensor can always tell you where “down” is. But it can also tell you the direction of the forces that are causing the device to move (remember: force = mass × acceleration). These forces can be caused by you shaking the phone, or moving up and down when it is in your pocket during walking. The gyroscope measures the rotation, or the change in 3D orientation. It measures the rate in radians per second around the three main axes of the device. Finally, the magnetometer is electronic compass that measures the direction of the Earth’s magnetic field in microtesla. Be aware that it is usually not very reliable indoors.
The beautiful thing is that CoreMotion can fuse the data of these three sensors into one data structure that gives simply the attitude, or 3D orientation, of the device. You can get this information in different formats: as Euler angles, as a rotation matrix, or as a quaternion. We will use the best one: quaternion.
Let’s start the work
Open a new project in Xcode and select iOS and Single View Application. Give the project a name and choose Swift as language.
First go to the Info.plist file and add a new row with the key: NSMotionUsageDescription. You can add a description as a value that reads something like “Internal sensors are accessed to find out in which direction the camera is pointed”. The key will automatically be changed into “Privacy – Motion Usage Description”. This is good practice because the user will be explicitly asked for permission to use the internal sensors.
We are going to use the CoreMotion framework. So open the ViewController.swift file and add this line at the top.
import CoreMotionThe CMMotionManager is the central object that coordinates all the actions of the internal sensors and is declared in the ViewController. Also add the property deviceQuaternion as an optional CMQuaternion. This will encode the orientation of the device and will be constantly updated as data from the sensors is streaming in. In the viewDidLoad() method we first check if the motionManager can deliver the service of giving us the device motion. We subsequently set the interval in between measurements as 1/30 seconds.
The real core of this block of code is the startDeviceMotionUpdates() method. It first needs to know which reference frame to use. We pick the one with z-axis aligned with the gravitational direction and the x-axis in an arbitrary direction in the horizontal plane. Then it needs its own OperationQueue so that the operations are not done on the main thread. Finally there is an event handler that needs a closure of type CMDeviceMotionHandler. Every time a measurement is done, we extract the attitude data from the CMDeviceMotion object in the form of a quaternion. Those values are assigned to our deviceQuaternion property.
class ViewController: UIViewController { let motionManager = CMMotionManager() var deviceQuaternion: CMQuaternion? override func viewDidLoad() { super.viewDidLoad() if motionManager.isDeviceMotionAvailable { motionManager.deviceMotionUpdateInterval = 1/30.0 motionManager.startDeviceMotionUpdates(using: .xArbitraryZVertical, to: OperationQueue(), withHandler: { (deviceMotion, error) in guard let data = deviceMotion else { return } self.deviceQuaternion = data.attitude.quaternion }) } }If you add a print statement for the deviceQuaternion you can see the values change as you rotate your device. These values are quite hard to understand. You can also print the data.attitude values that give you the three Euler angles pitch, roll, and yaw in degrees. These values are a bit easier to interpret.
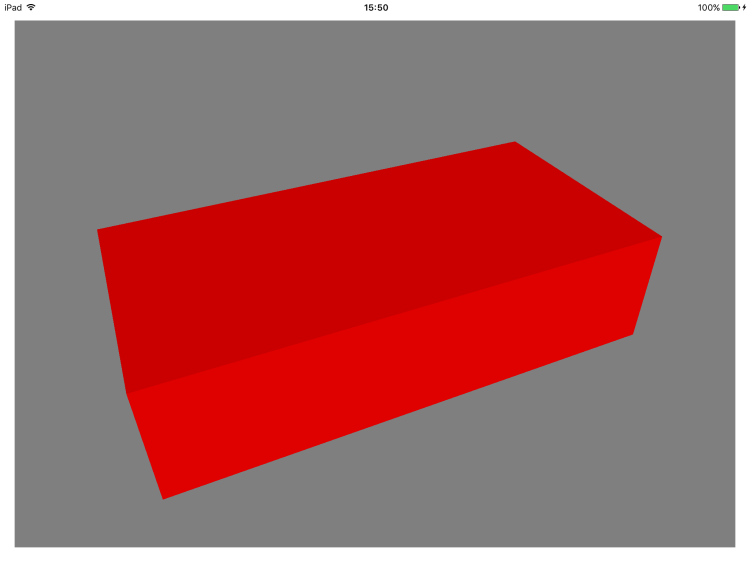
Red box
We will leave the sensor data aside for a while and concentrate on displaying a 3D object. First you have to add the SceneKit framework.
import SceneKitNow go the the Storyboard and add a SceneKit view, a SCNView. Add an outlet to the view controller named boxView. Additionally, we define an optional SCNode called boxNode. We will need that later for changing the orientation of our red box.
@IBOutlet weak var boxView: SCNView! var boxNode: SCNNode?Add the lines below to the viewDidLoad() method. First, we define the central SCNScene object that will represent our 3D scene and all its attributes in a graph. We assign our graphicsScene to the scene of our boxView. We give the background of the scene the color gray and switch on some default lights. Now that the scene is set, we initialise our boxNode. We set the geometry to a SCNBox with dimensions 4.0, 2.0, and 1.0 respectively. The color of the box is set to red. In the last line the boxNode is added as a child to the rootNode of the graph of our scene.
let graphicsScene = SCNScene() boxView.scene = graphicsScene boxView.backgroundColor = UIColor.gray boxView.autoenablesDefaultLighting = true boxNode = SCNNode() if let box = boxNode { box.geometry = SCNBox(width: 4.0, height: 2.0, length: 1.0, chamferRadius: 0.0) box.geometry?.firstMaterial?.diffuse.contents = UIColor.red graphicsScene.rootNode.addChildNode(box) }If you build and run your app, you will see a top view of the box, a red rectangle on a gray background. Exciting!
Box with constant orientation
The interesting step is to connect the orientation data from the sensors to the orientation of the box. We are going to use a render delegate method that is run for each frame that is shown in our boxView. Add the SCNSceneRendererDelegate protocol to the ViewController class.
class ViewController: UIViewController, SCNSceneRendererDelegateIn the viewDidLoad() method set the delegate of the boxView to self. Make sure that the scene is actually playing by setting the isPlaying property to true.
boxView.delegate = self boxView.isPlaying = trueThe delegate method is called renderer(_:didApplyAnimationsAtTime:) and is one in a set that are active in different phases of the render loop. In this case we take our measured quaternion, flip the x and y around, add some minus signs, and assign it to the orientation property of the boxNode.
func renderer(_ renderer: SCNSceneRenderer, didApplyAnimationsAtTime time: TimeInterval) { if let q = self.deviceQuaternion { let quaternion = SCNQuaternion(q.y, -q.x, -q.z, q.w) boxNode?.orientation = quaternion } }If you build and run your app, you should see a red box that keeps the same orientation relative to the world when you rotate your device.
What can you do next?
The cameras in your device are fixed. So the 3D orientation of your camera is the same as the 3D orientation of your device. Maybe, you need to add a minus sign somewhere in your code if you change from the front camera to the back camera. The bottom line is that you now have access to this crucial piece of information.
You can find the code here.
If you have any questions or suggestions, you can contact me here.